0
Discussions for Scenes for Version 1.2.X Fullscreen Mode here Forum / Alles über iStripper
28. December 2018
There was a problem a while back that @spoophmaniac had whereby none of the 2D cam scenes worked correctly on his 2560 x 1440 monitor. There was large black bar down one side.
I messed around with the 2D cam size and scaling but couldn't get it to work. I even asked in here and @TheEmu couldn't see anything wrong with the coding.
I changed the scene to a 3D camera and with the appropriate sizing I got the scene to work on @spoophmaniac"s monitor in fullscreen without any black bars.
Z22
Mitglied seit in Aug 2017 1166 Beiträge
28. December 2018 (edited)
Odd, not come across that problem before. I did a scene for someone else with an ultrwide display and it worked fine on his. Maybe the background hadn't been scaled to be the same as the screen dimentions? You haven't got a copy of it have you (the non working version)? Would like to take a look.
x26638184
Mitglied seit in Oct 2018 189 Beiträge
28. December 2018
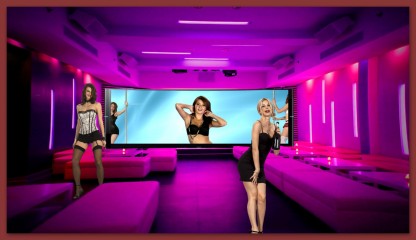
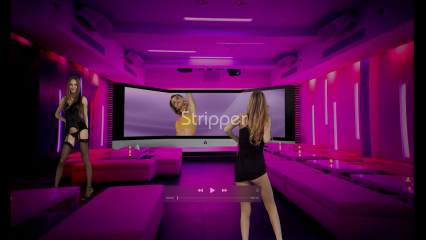
WoW! ... I see you are entertained with this. I'm glad!!! @R2D34ever2, he asked me some pictures of the videos to build scenes and yesterday I had some time to write the whole scene. It's a test scene, you can play a lot with it, change photos, take advantage of the transparency of the curtains, etc., etc. You can apply shadows and reflections but if you did the performance, it would go to hell, so I left it so that each one according to the hardware that complements it. In general it is a scene that supports almost all modes (Pole, table, Top, in out, swing)
I am struck by the fact that I could support 2 modes of the same clip using only one girl.
The use of scales has to do with technical issues in the videos to know how many pixels a girl has (no more than 1,200 in many cases, it is limiting in 4K projects). in this way I can know how much zoom I can use (usually 1.5)
Those who want can send me an MP with their mail and add it to the list of the shared folder so that it is in one place.
28. December 2018
@Z22
This is the original forum discussions forum discussions at the timeAll the variations of the scenes file can be found here
https://www.dropbox.com/s/91mrl62jtkflmrq/Perforations.zip?dl=0
If you have the original Totem Perforations scene it might be prudent to tempoarrily remove it or back it up as this fille wwill try to overwrite the original.
The monitor was actually 2560 x 1080 (not 1440).
This is the original forum discussions forum discussions at the time
http://www.istripper.com/forum/thread/27449/75?post=591101
Alles über iStripper / Discussions for Scenes for Version 1.2.X Fullscreen Mode here
I was just wondering are there any scenes that support 2560x1080 ultrawide? When I switch to full screen mode I either have black bars on the sides or one black bar on the right. Thank you.
https://www.dropbox.com/s/91mrl62jtkflmrq/Perforations.zip?dl=0
If you have the original Totem Perforations scene it might be prudent to tempoarrily remove it or back it up as this fille wwill try to overwrite the original.
The monitor was actually 2560 x 1080 (not 1440).
x26638184
Mitglied seit in Oct 2018 189 Beiträge
28. December 2018 (edited)
The way to solve the screen adjustment is simple.
camera {
type: 2D
pos: 1520, 1080
size: 3040, 1710
} //// This closing is important if it is not unbalanced or makes the scene show it wrong. Several native scenes have that problem
Using 3D camera can be interesting
The use of a 16: 9 ratio is due to the standard of the current screens (Tvs LCDs) Laptop monitors usually use 16:10 ratio
x26638184
Mitglied seit in Oct 2018 189 Beiträge
28. December 2018
This table can be used by many to define shading and other things.
The 3K frame is how we recorded this approximate (a lot of background, took little advantage of the resolution of the camera). Having created a 4 mode as Top Zoom (From the navel upwards, it would have been good, more details of the girls would be seen.
The 3K frame is how we recorded this approximate (a lot of background, took little advantage of the resolution of the camera). Having created a 4 mode as Top Zoom (From the navel upwards, it would have been good, more details of the girls would be seen.
Z22
Mitglied seit in Aug 2017 1166 Beiträge
28. December 2018
camera {
type: 2D
pos: 1520, 1080
size: 3040, 1710, // is not a 4k screen. 3840, 2160 is. displaying 3040, 1710 on a 4k screen causes it to be scaled to fit 3840, 2160 which in turn causes image degredation.
all sprite and clipsprite nodes go in here before closing the camera node.
}
having...
camera {
type: 2D
pos: 1520, 1080
size: 3040, 1710
}
sprite
{
blah blah blah
)
will not work correctly.
type: 2D
pos: 1520, 1080
size: 3040, 1710, // is not a 4k screen. 3840, 2160 is. displaying 3040, 1710 on a 4k screen causes it to be scaled to fit 3840, 2160 which in turn causes image degredation.
all sprite and clipsprite nodes go in here before closing the camera node.
}
having...
camera {
type: 2D
pos: 1520, 1080
size: 3040, 1710
}
sprite
{
blah blah blah
)
will not work correctly.
Z22
Mitglied seit in Aug 2017 1166 Beiträge
28. December 2018
eg:-
is incorrect.
camerais correct
{
type: 2D
size: 3840, 2160
pos: 1920, 1080
sprite
{
pos: -500, 0
source: SharpMask
}
sprite
{
pos: 0, 0
source: Girl
}
sprite
{
pos: 500, 0
source: N_Hance
}
}
camera
{
type: 2D
size: 3840, 2160
pos: 1920, 1080
}
sprite
{
pos: -500, 0
source: SharpMask
}
sprite
{
pos: 0, 0
source: Girl
}
sprite
{
pos: 500, 0
source: N_Hance
}
is incorrect.
x26638184
Mitglied seit in Oct 2018 189 Beiträge
28. December 2018
In general they do not use this scene with more than 2 girls, they will give head *****. or it's going to look like a scene from the Deconic Dimesion
Z22
Mitglied seit in Aug 2017 1166 Beiträge
28. December 2018
@Number6, Some very odd things in there such as...
standingHeight: 800
sittingHeight: 600
source: MyClip
scale: -4, 3 , 3
in effect this scales the clip with standing/sitting height then scales it up in a 4:3 aspect ratio which makes the girls look fat.
standingHeight: 800
sittingHeight: 600
source: MyClip
scale: -4, 3 , 3
in effect this scales the clip with standing/sitting height then scales it up in a 4:3 aspect ratio which makes the girls look fat.
R2D34ever2
Mitglied seit in Dec 2007 352 Beiträge
28. December 2018
I tried something else with your scene 7171al71..
i think it works quit well..
https://www.dropbox.com/s/p9ggs1hydq34skq/Video%20Room-3%20-%20kopie.zip?dl=0
if you like it you can alter it like you want it and share it in the right topic.
i think it works quit well..
https://www.dropbox.com/s/p9ggs1hydq34skq/Video%20Room-3%20-%20kopie.zip?dl=0
if you like it you can alter it like you want it and share it in the right topic.
28. December 2018
@Z22
In that particular version I think I was trying to counteract the ***** caused by the odd aspect ratio. It is a long time since I did these so remembering exactly why I did certain things is now somewhat vague.
In the final version (V7 Altered) the scaling is back to -3, 3, 3. This is the version that worked best for @spoophmaniac.
I also tried the same thing with another of Totem's 2D scenes and this also worked correctly on @spoophmaniac"s system.
x26638184
Mitglied seit in Oct 2018 189 Beiträge
28. December 2018
@Z22: Thanks for the scope, it was wrong the resolution should be 3840x2160. Opt for the practical and adjust the scenes in the following way:
Table Mode
Pole mode
Top mode (behind the bed)
Moto Top B (Zoom)
The highs were fixed with StandHight and SittingHeight
The zip was updated
@R2D34ever2: se ve genial!!
x26638184
Mitglied seit in Oct 2018 189 Beiträge
28. December 2018
@R2D34ever2:
Le hice un par de ajustes menores
- Cambie la pantalla
- Cambie color de pantalla
- Te inclui en los creditos
- Inclui video demo
Queda como la versión oficial
https://drive.google.com/drive/folders/1BwYK60pj6NdByGGmOqAWY_-MBmPijhH1?usp=sharing
x26638184
Mitglied seit in Oct 2018 189 Beiträge
29. December 2018
@Number6: This left me stunned !!!! ... There are all the answers I ever asked and nobody explained them well.
Checking carefully the scene -Perforations-:
1.- The color of the gradient changes dynamically and is written by code
- This confirms that you can make simple objects by code (squares, circles, triangles)
- From this it follows that you can create an object with solid color or gradient, can be radial, linal or conical if the correct instruction is given
- You can make color transitions (if applied in the scene of -Water- you could have color dynamics)
2.- The figure acts as an alpha mask also defined by code (This is key in performance, a mask written by code has no impact on the CPU, a mask generated with a PNG consumes a lot of resources)
If this scene is crumbling, a good foundation can be established.
Do you know how to crumble it this way?
Scene 1: Girl + elements
Scene 2: Girl + mask
No matter the sizes, the important thing is to know constriur the elements and that indivualizen
Ex:
// Circle
code ... blah, blah, blah
//Square
code ... blah, blah, blah
In the case of gradients I know something like this works:
color A + color B + angle of inclination (0, 15, 45 or other)
Z22
Mitglied seit in Aug 2017 1166 Beiträge
29. December 2018 (edited)
2.- The figure acts as an alpha mask also defined by code (This is key in performance, a mask written by code has no impact on the CPU, a mask generated with a PNG consumes a lot of resources)
The girls are in the format rgba.., red green blue alpha. I suppose because you haven't started messing with shaders you missed that, however the alpha is used over and over again in totem scenes for shadows and it's what the "blend: true" uses to determine how to mix the images together.
Using a premade alpha mask(the girls mask is premade) is quicker than generating one at runtime because runtime mask creation does it every frame rather than just referencing a premade image.
Gradients, did you not look at the scene i uploaded recently "GB_V1.0" ?
http://www.istripper.com/forum/thread/29408/28?post=601082
Alles über iStripper / Share your FullScreen - Member Created Scenes here
https://drive.google.com/open?id=1uBg_anvs-fP7jOGN1v2rCvtLc3xkN1mQ Just creates a nice colour cycling gradient background.
Z22
Mitglied seit in Aug 2017 1166 Beiträge
29. December 2018
@Alarsi76 Watch this guys videos https://www.youtube.com/channel/UCcAlTqd9zID6aNX3TzwxJXg
Shadertoy is a bit different (mainly how some things are named) to how gl in istripper works but you will see how a lot of things work.
Shadertoy is a bit different (mainly how some things are named) to how gl in istripper works but you will see how a lot of things work.
x26638184
Mitglied seit in Oct 2018 189 Beiträge
30. December 2018
@Z22: Yep, the truth is that I have not developed anything here and I have lost things for sure. Building scenes in iStripper can be very slow.
The current development mechanics today I see it by another way that I can control all the parameters.
OpenCl, I left it, I preferred to study other software.
There are things that I am always lame here and it is because I do not have the basic theory necessary. They are simple things, but without the domain of that base, I will always limp.
Example, to make a prefect shadow here to understand the code is Chinese for me. However, in other software it is something trivial, it defocuses so many piexels, it applies a mathering of many others, it distorts in such and such a way, it acts in such a way against the background or objects in such a way and that's it! It would be easy to laugh at how easy it is to know the base.
Many examples here are combined with others and understanding and demolishing the code to understand it is complicated. The same example cited above .... Mix 6 basic situations !!!!
Regarding performance if there is a difference in how the order is executed. A Transparent Image or Video (RGBA) are 4 process channels, we say that it weighs 4 MB (1 per channel), if you add a shadow it is 8MB (it processes the file twice) and if I apply a blur it weighs 10 and it is the info which processes the buffer.
On the contrary that if I say to the buffer the following thing: it reads the file RGBA of 4MB, it inverts the alpha displaces it and it defocuses x pixels. I send 4 MB to the process buffer.
If I place a mask .PNG on an object the same thing happens (RGBA) +1 additional channel = 5MB
If the mask is pure code, it only processes 4MB
Sometimes it is necessary to use PNG, sometimes not. It is unnecessary burden.
30. December 2018 (edited)
@7171al71
I am not sure if this helps but there is another way of changing the colors in a shader by putting the shader in a framebuffer and calling it as a sprite in the main scene. You can then use "lights" to change the colour of the shader. You need to include the statement material: true in the sprite definition.
This is demonstrated in the following:
https://www.dropbox.com/s/ujuvghkiw0wczam/Water.zip?dl=0
Extract the scene files and the images folder to the "Water" folder in your "Scenes" folder.
The first variant uses a very rapidly varying shift of the lights. I tend to find this works quite well for a lot of "rock" music.
The other variants are slowed down and have different colour sequences.
Apologies if this isn't quite what you wanted.
Z22
Mitglied seit in Aug 2017 1166 Beiträge
30. December 2018 (edited)
@Alarsi76, if you process the shadow in a .fsh along with the girl yeh, it doesn't increases the ram useage. If you create the shadow in a shader and use that output later on then it is a texture.
If i wanted to create a gradient that masks off part of the girl in a shader i would do something like this...
Not actually tested this but i think it would work.
The way I got used to shaders was to mess about with other peoples scenes. I started off just messing with the stripclub scene, then found a helpful bug (feedback) and off i went(first scene was Acid). I try to do as much as i can in shader rather than in the camera node as i found that too many things especially blends in the camera node choke the framerate.
I don't know what mac you have but you might want to check which gpu istripper is using when it's running (if it has a dedicated and integrated gpu's).
If i wanted to create a gradient that masks off part of the girl in a shader i would do something like this...
then in the shader after all the usual code.
in the .scn
framebuffer
{
id: Girl
size:
pos:
clipsprite
{
size:
pos:
source: clip
standingheight:
sittingheight:
}
framebuffer
{
id: MaskedGirl
size:
pos:
sprite
{
size:
pos:
source: Girl, 0
shader: Masking.fsh
}
vec3 color = mix(Girl.rgb, vec3(0.0), vTexcoord.y);
Girl.a -= vTexcoord.y; // it may be... Girl.a -= 1.0-vTexcoord.y;
glFragColor = vec4(color.rgb, Girl.a);
or you could just mix the alpha
Girl.a = mix(Girl.a, vec3(0.0), vTexcoord.y);
Not actually tested this but i think it would work.
The way I got used to shaders was to mess about with other peoples scenes. I started off just messing with the stripclub scene, then found a helpful bug (feedback) and off i went(first scene was Acid). I try to do as much as i can in shader rather than in the camera node as i found that too many things especially blends in the camera node choke the framerate.
I don't know what mac you have but you might want to check which gpu istripper is using when it's running (if it has a dedicated and integrated gpu's).
x26638184
Mitglied seit in Oct 2018 189 Beiträge
30. December 2018
Z22: estuve probando con esto, intencionalmente feo para que se comprenda
clip {
id: MyClip
deny: table,top
border: 50
}
//////////////////////////////////////////////
framebuffer
{
id: Girl Reflection
hotspot: 0.5, 0.5
size: 500, 500
pos: 960, 540
clipSprite
{
source: MyClip
hotspot: 0.5, 0.5
scale: 5
pos: -700, 5000
}
}
//////////////////////////////////////////////
camera {
type: 2D
size: 1920, 1080
}
//FONDO VERDE
quad {
size: 1920, 1080
pos: 0, 0
color: 0.0, 0.5, 0.0, 0.0, 1.0
hotspot: 0, 0
}
//FIGURA ROJA
quad {
size: 500, 500
pos: 1000, 540
color: 0.5, 0.0, 0.0, 0.0, 1.0
hotspot: 0.5, 0.5
}
//GIRL BACK
clipSprite {
hotspot: 0.5, 0.5
pos: 960, 2000
scale: -2.0, 2.0
color: 0, 0, 0
opacity: 0.5
source: MyClip
}
//GIRL
clipSprite {
hotspot: 0.5, 0.5
pos: 960, 1070
scale: 1.0
source: MyClip
}
//FIGURA AZUL
quad {
size: 500, 500
hotspot: 0.5, 0.5
pos: 1500, 540
color: 0.0, 0.0, 0.5, 0.0, 1.0
}
//FIGURA GRIS
quad {
size: 500, 500
pos: 500, 540
color: 0.3, 0.3, 0.3, 0.0, 1.0
hotspot: 0.5, 0.5
}
/// ORIGINAL REFLEJ0 //////////////////////////////////////////////////////
sprite
{
hotspot: 0.5, 0.5
size: 500, 500 // Esto controla el tamaño del frambuffer
pos: 1500, 540. // Esto controla la posición del frambuffer
opacity: 1.0
source: Girl Reflection
}
clipNameSprite {
scale: 1.0
pos: 960, 540, 1
hotspot: 0.5, 0.5
source: MyClip
}
}
Z22
Mitglied seit in Aug 2017 1166 Beiträge
30. December 2018
What were you trying to do?
Z22
Mitglied seit in Aug 2017 1166 Beiträge
30. December 2018
color: 0.5, 0.0, 0.0, 0.0, 1.0
5 variables?
color: (red, green, blue)
opacity: (***** alpha)
blend: true (use image alpha)
5 variables?
color: (red, green, blue)
opacity: (***** alpha)
blend: true (use image alpha)
Z22
Mitglied seit in Aug 2017 1166 Beiträge
30. December 2018
@7171al71
https://drive.google.com/open?id=1WtXvn0nz3EfM7UVCErSW4SP0Ez8o-K2a
messed with your test scene a bit.
https://drive.google.com/open?id=1WtXvn0nz3EfM7UVCErSW4SP0Ez8o-K2a
messed with your test scene a bit.
x26638184
Mitglied seit in Oct 2018 189 Beiträge
31. December 2018
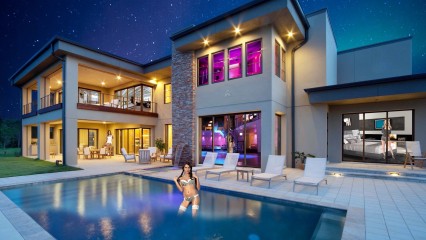
I made some improvements to the scene of the piece and it remains
https://drive.google.com/drive/folders/1fRMsw54-49DElnI66s8Id1PIVzjhIFZY?usp=sharing
x26638184
Mitglied seit in Oct 2018 189 Beiträge
31. December 2018
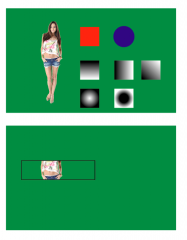
@Z22: In the test scene I wanted to do what it shows:
Color background defined by code
3 Squares for one of a different color
The girl is in the middle and the left and right cudrados is on her
Mascara defined by code and in a specific location (here I do not know if it's ok, it works, but I'm left doubtful if it's well written, it's strange the behavior that this has)
They are basic concepts, but once they are demined and combined with each other, much can be done
---
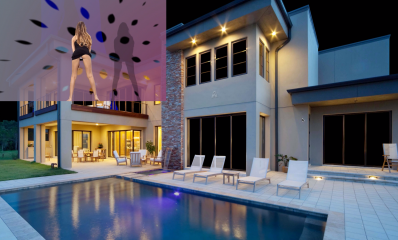
In the scene of the piece, use a trick, it is the same 4K scene but the camera frames it to 1920 x1080, and move the elements a bit, it was very easy and fast. Istripper software is responsible for readjusting the video output according to the resolution of the screen, regardless of what the camera says.
The practical application of this is that I could write the whole house scene at 5K and make multiple frames of 1920x1080 ... nice!😎
Color background defined by code
3 Squares for one of a different color
The girl is in the middle and the left and right cudrados is on her
Mascara defined by code and in a specific location (here I do not know if it's ok, it works, but I'm left doubtful if it's well written, it's strange the behavior that this has)
They are basic concepts, but once they are demined and combined with each other, much can be done
---
In the scene of the piece, use a trick, it is the same 4K scene but the camera frames it to 1920 x1080, and move the elements a bit, it was very easy and fast. Istripper software is responsible for readjusting the video output according to the resolution of the screen, regardless of what the camera says.
The practical application of this is that I could write the whole house scene at 5K and make multiple frames of 1920x1080 ... nice!
x26638184
Mitglied seit in Oct 2018 189 Beiträge
31. December 2018
I want to finish this scene and I would like you to go the names of the collaborators.
Technical problems:
1.- The girls drown (😂 )
2.- you have to ***** the categories to work correctly (Press down arrow until you load in the order you should do it)
Demo:
https://drive.google.com/drive/folders/1H9W06hNWyd_J8W00tnt0fOkey3ZNLkow?usp=sharing
CODE:
/////////////////////////////////////
// Visual Concept by Alarsi // www.vimeo.com/alarsi
// Alarsi is Trade Mark
// Collaborators:
// Authorization for domestic or educational use. Do not use for commercial use
// iStripper is Trade Mark // www.istirpper.com
////////////////////////////////////
logo: logo/logo_istripper.png
splash: logo/small_logo_istripper.png
text: logo/text.txt
//MICHAELA ISIZZU
clip {
id: PrincipalGIrl
deny: pole, table, inout, cage
}
//UMA JOLIE
clip {
id: BackGirl
deny: pole, table, cage, glass
}
//GLORIA C
clip {
id: GirlGlass
deny: pole, table, cage
}
texture {
id: Rooms
source: fondos/rooms.png
}
texture {
id: Fondo
source: fondos/Casa piscina 1.png
}
texture {
id: Mascara Agua
source: fondos/mascara agua.png
}
texture {
id: Cielo
source: fondos/Casa cielo 1.png
}
texture {
id: Arbol1
source: fondos/arbol1.png
}
texture {
id: Arbol2
source: fondos/arbol2.png
}
texture {
id: GirWindow
source: fondos/GirlTV.png
}
camera {
type: 2D
pos: 1520, 1080
size: 3840, 2160
}
//CIELO
sprite {
size: 4040, 2160
pos: 1920, 1080
source: Cielo
blend: false
}
//FONDO AGUA
quad { // Non textured quad polygon.
size: 3840, 900
pos: 0, 1500
hotspot: 0, 0
shader: fragment,cyanwater.fsh // fragment or vertex and source file of the GLSL shader.
}
//ROOMS
sprite {
size: 3840, 2160
pos: 1920, 1080
source: Rooms
blend: true
}
// GIRL WINDOW GLASS (GLORIA C)
clipSprite {
pos: 2100, 1500
StandingHeight: 300
source: GirlGlass
}
// GIRL WINDOW
sprite {
scale: 0.4
pos: 3500, 1250
source: GirWindow
blend: true
}
//HOUSE
sprite {
size: 3840, 2160
pos: 1920, 1080
source: Fondo
blend: true
}
// BACK GIRL (UMA JOLIE)
clipSprite {
pos: 1000, 1100
StandingHeight: 250
source: BackGirl
}
// PRINCIPAL GIRL ( MICHAELLA)
clipSprite {
pos: 1500, 2200
StandingHeight: 700
source: PrincipalGIrl
}
//MASCARA FRONTAL
sprite {
scale: 0.8
pos: 1600, 2160
source: Mascara Agua
opacity: 0.98
blend: true
}
light {
ambient: 1.0, 1.0, 1.0
}
}
Technical problems:
1.- The girls drown (
2.- you have to ***** the categories to work correctly (Press down arrow until you load in the order you should do it)
- Uma Jolie, just make a swing
- Gloria C should only clean the glass (It is punished by disordered
😈 )
Demo:
https://drive.google.com/drive/folders/1H9W06hNWyd_J8W00tnt0fOkey3ZNLkow?usp=sharing
CODE:
/////////////////////////////////////
// Visual Concept by Alarsi // www.vimeo.com/alarsi
// Alarsi is Trade Mark
// Collaborators:
// Authorization for domestic or educational use. Do not use for commercial use
// iStripper is Trade Mark // www.istirpper.com
////////////////////////////////////
logo: logo/logo_istripper.png
splash: logo/small_logo_istripper.png
text: logo/text.txt
//MICHAELA ISIZZU
clip {
id: PrincipalGIrl
deny: pole, table, inout, cage
}
//UMA JOLIE
clip {
id: BackGirl
deny: pole, table, cage, glass
}
//GLORIA C
clip {
id: GirlGlass
deny: pole, table, cage
}
texture {
id: Rooms
source: fondos/rooms.png
}
texture {
id: Fondo
source: fondos/Casa piscina 1.png
}
texture {
id: Mascara Agua
source: fondos/mascara agua.png
}
texture {
id: Cielo
source: fondos/Casa cielo 1.png
}
texture {
id: Arbol1
source: fondos/arbol1.png
}
texture {
id: Arbol2
source: fondos/arbol2.png
}
texture {
id: GirWindow
source: fondos/GirlTV.png
}
camera {
type: 2D
pos: 1520, 1080
size: 3840, 2160
}
//CIELO
sprite {
size: 4040, 2160
pos: 1920, 1080
source: Cielo
blend: false
}
//FONDO AGUA
quad { // Non textured quad polygon.
size: 3840, 900
pos: 0, 1500
hotspot: 0, 0
shader: fragment,cyanwater.fsh // fragment or vertex and source file of the GLSL shader.
}
//ROOMS
sprite {
size: 3840, 2160
pos: 1920, 1080
source: Rooms
blend: true
}
// GIRL WINDOW GLASS (GLORIA C)
clipSprite {
pos: 2100, 1500
StandingHeight: 300
source: GirlGlass
}
// GIRL WINDOW
sprite {
scale: 0.4
pos: 3500, 1250
source: GirWindow
blend: true
}
//HOUSE
sprite {
size: 3840, 2160
pos: 1920, 1080
source: Fondo
blend: true
}
// BACK GIRL (UMA JOLIE)
clipSprite {
pos: 1000, 1100
StandingHeight: 250
source: BackGirl
}
// PRINCIPAL GIRL ( MICHAELLA)
clipSprite {
pos: 1500, 2200
StandingHeight: 700
source: PrincipalGIrl
}
//MASCARA FRONTAL
sprite {
scale: 0.8
pos: 1600, 2160
source: Mascara Agua
opacity: 0.98
blend: true
}
light {
ambient: 1.0, 1.0, 1.0
}
}
R2D34ever2
Mitglied seit in Dec 2007 352 Beiträge
31. December 2018
/////////////////////////////////////
// Visual Concept by Alarsi // www.vimeo.com/alarsi
// Alarsi is Trade Mark
// Collaborators:
// Authorization for domestic or educational use. Do not use for commercial use
// iStripper is Trade Mark // www.istirpper.com
////////////////////////////////////
what is istirper Alarsi ?? lol
Happy New Year !!!
x26638184
Mitglied seit in Oct 2018 189 Beiträge
31. December 2018 (edited)
Ups!...😳 ...ya quedo corregido😆 ...Acabas de colaborar😂 !!!
Acabo de dejar un .zip, con toda la info dentro de la misma carpeta (.scn, fotos, etc)
Acabo de dejar un .zip, con toda la info dentro de la misma carpeta (.scn, fotos, etc)
Z22
Mitglied seit in Aug 2017 1166 Beiträge
31. December 2018 (edited)
clip {
id: GirlGlass
allow: glass
}
clip {
id: BackGirl
allow: top
}
id: GirlGlass
allow: glass
}
clip {
id: BackGirl
allow: top
}
Noch keine Teilnahmeberechtigung
Als ein Gratisnutzer von iStripper bist du nicht berechtigt Beiträge zu schreiben oder neue Topics zu starten.
Aber du hast Zugriff auf die grundlegenden Bereiche und kannst unsere Community kennen lernen


